Applying textures is one of the most essential skills in developing a complex, aesthetically coherent 3d model, and the cube is about as simple an object to UV as you get. 6 squares, when cut and arranged correctly, make for an easy introduction to the basics of laying out UVs and understanding how seams and UV shells work.
Start with a 10x10x10 cube
Give it a .05 Bevel to smooth it out
Then set the segments to an even number to allow for a clean UV cut later
Open up the UV editor and select the middle-most edges of the front of our cube
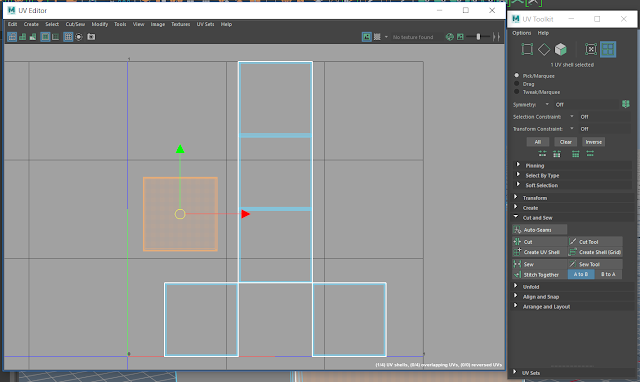
Cut out the front face of the cube, and subsequently cute the others and arrange them on along the 1x1 UV map

Cut and arrange the faces to minimize unused space
Create your material with the image file you wish to assign to the cube, apply this material to your cube and export it to Unreal
Open up unreal and import the material over from your pervious project to save a bit of time, then set up a texture sample, setting the Filter type to Nearest to prevent the texture from becoming blurry
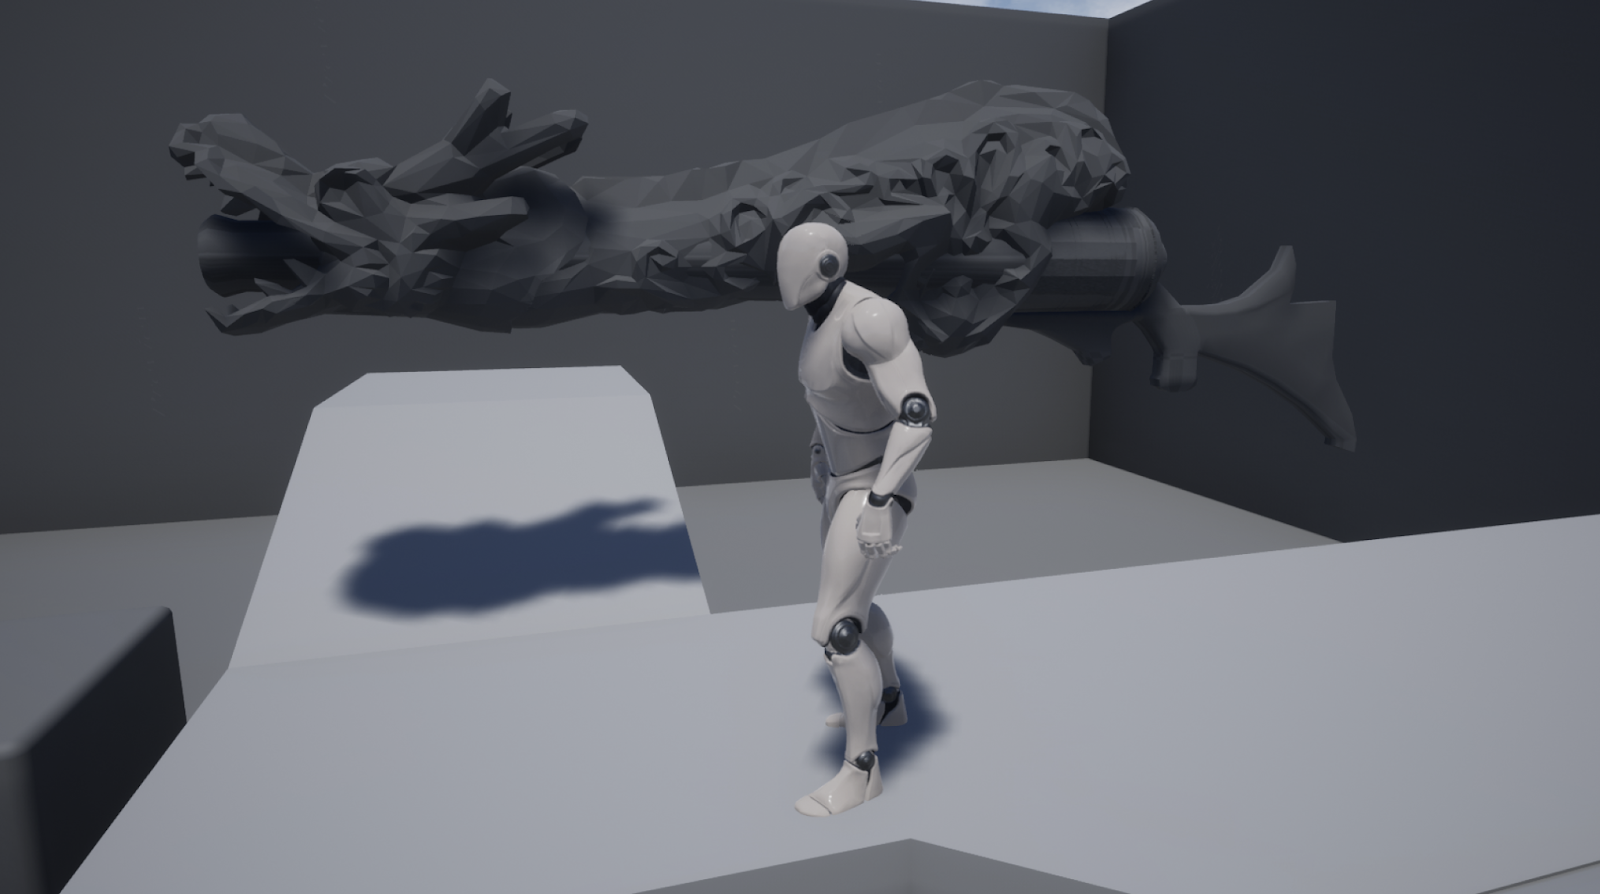
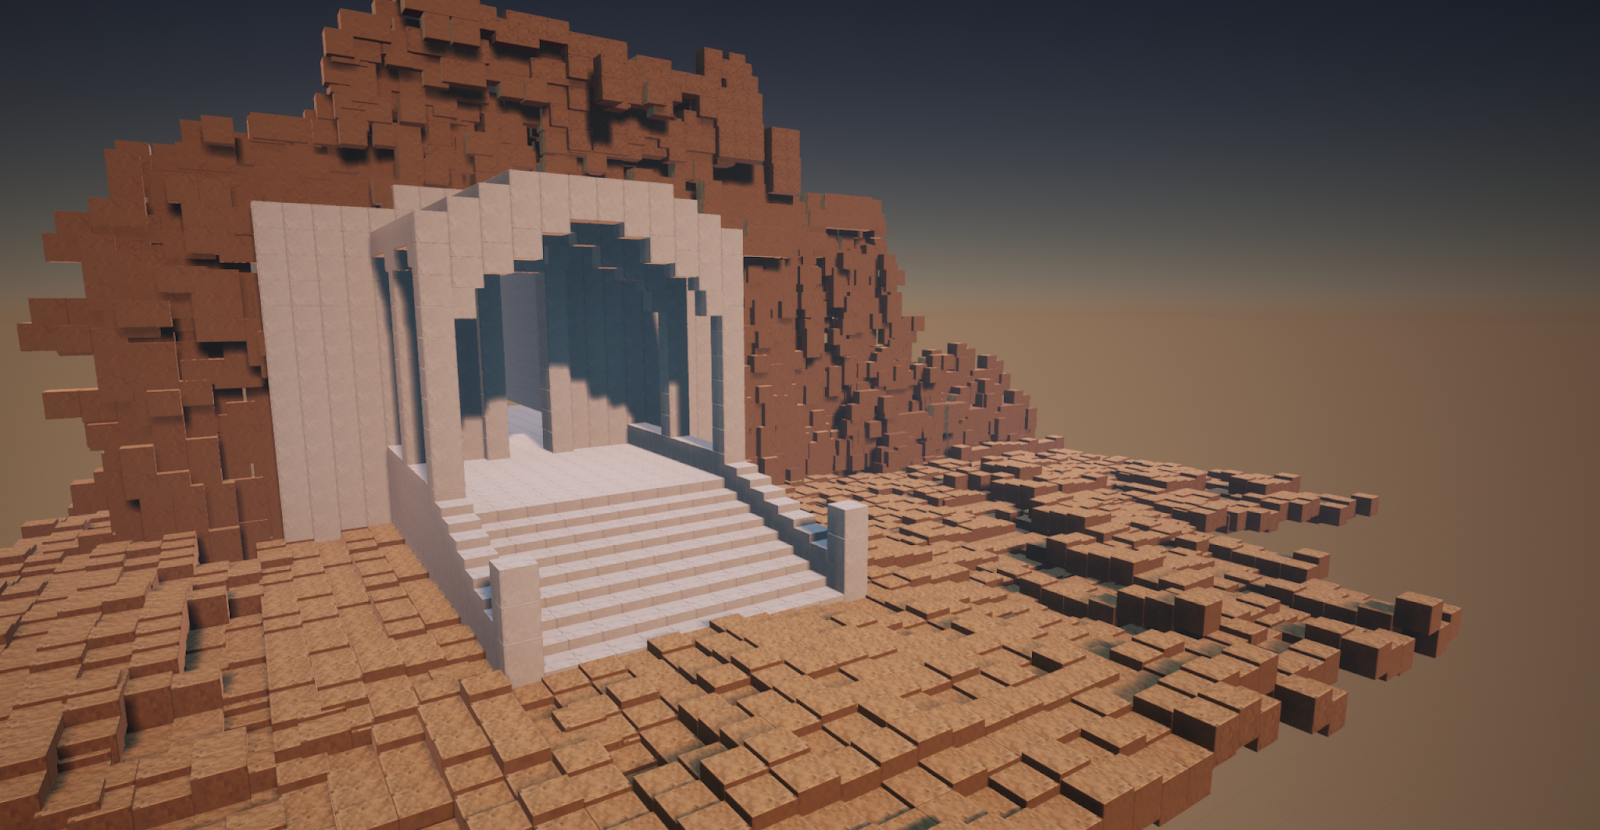
Now that your block is set up, you can create your own textures and set up a custom environment
While I can say I like how the rock face and ground looks, the blocky shape of the temple really leaves a lot to be desired. Rounding and the ability to work with smaller blocks at least would really help to sell any sort of detail beyond the most abstracted shapes of the temple.
 Original by John Berkey
 Paintover of my model without perspective lines


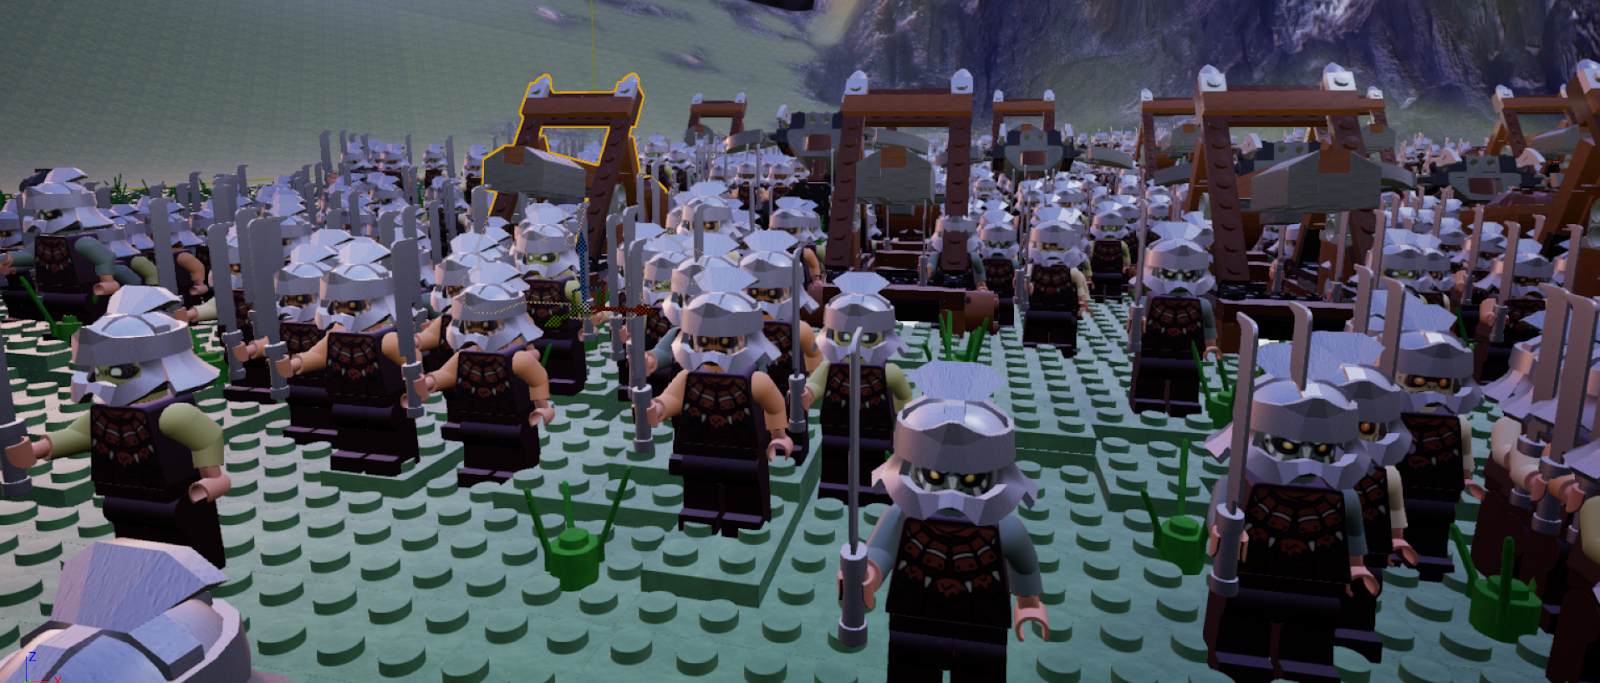

 After the Orcs, we created an actor blueprint for the Rahirim. This included their figures, helmets, and horses along with the materials to make it all happen visually.


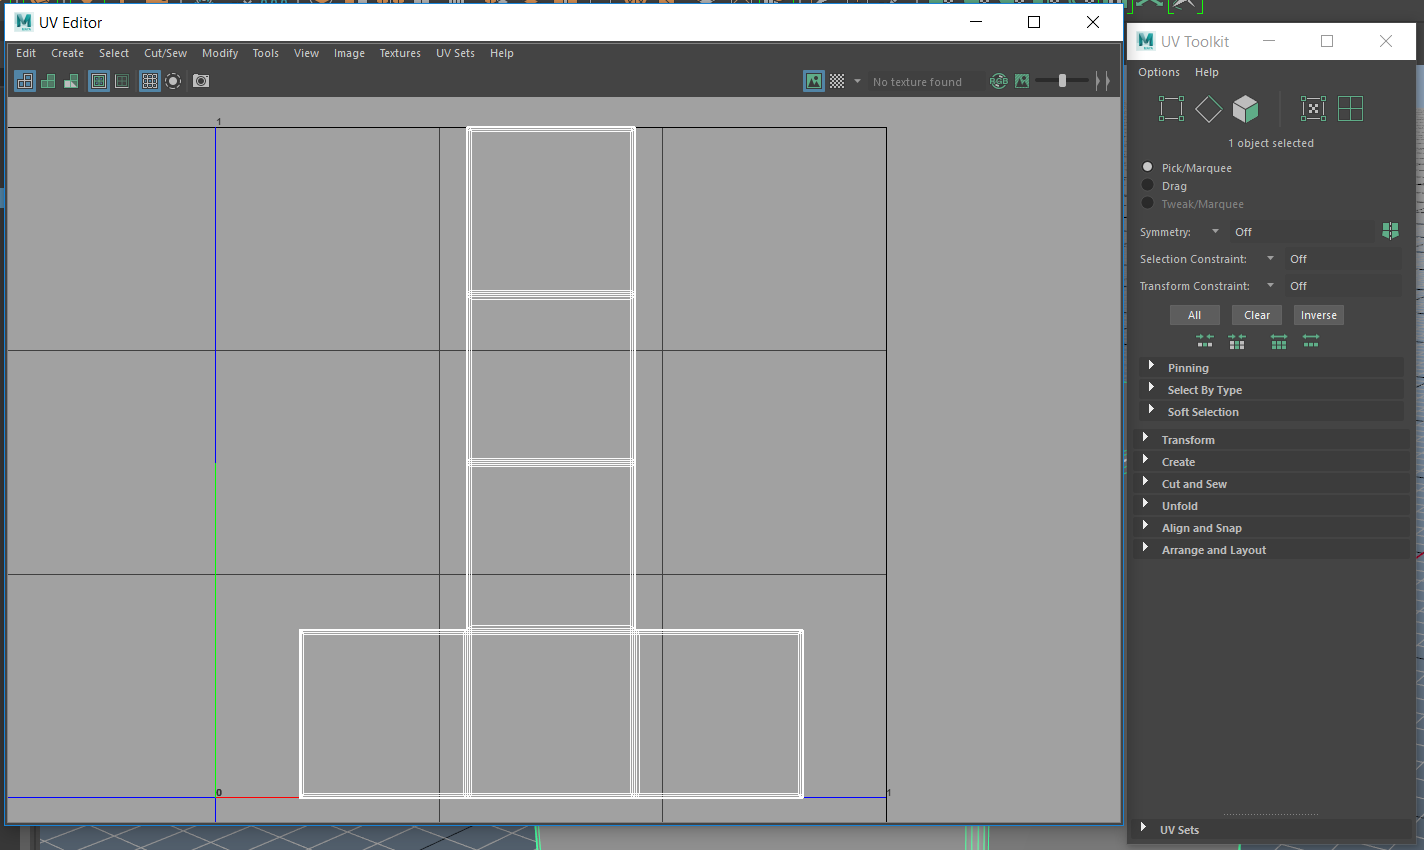
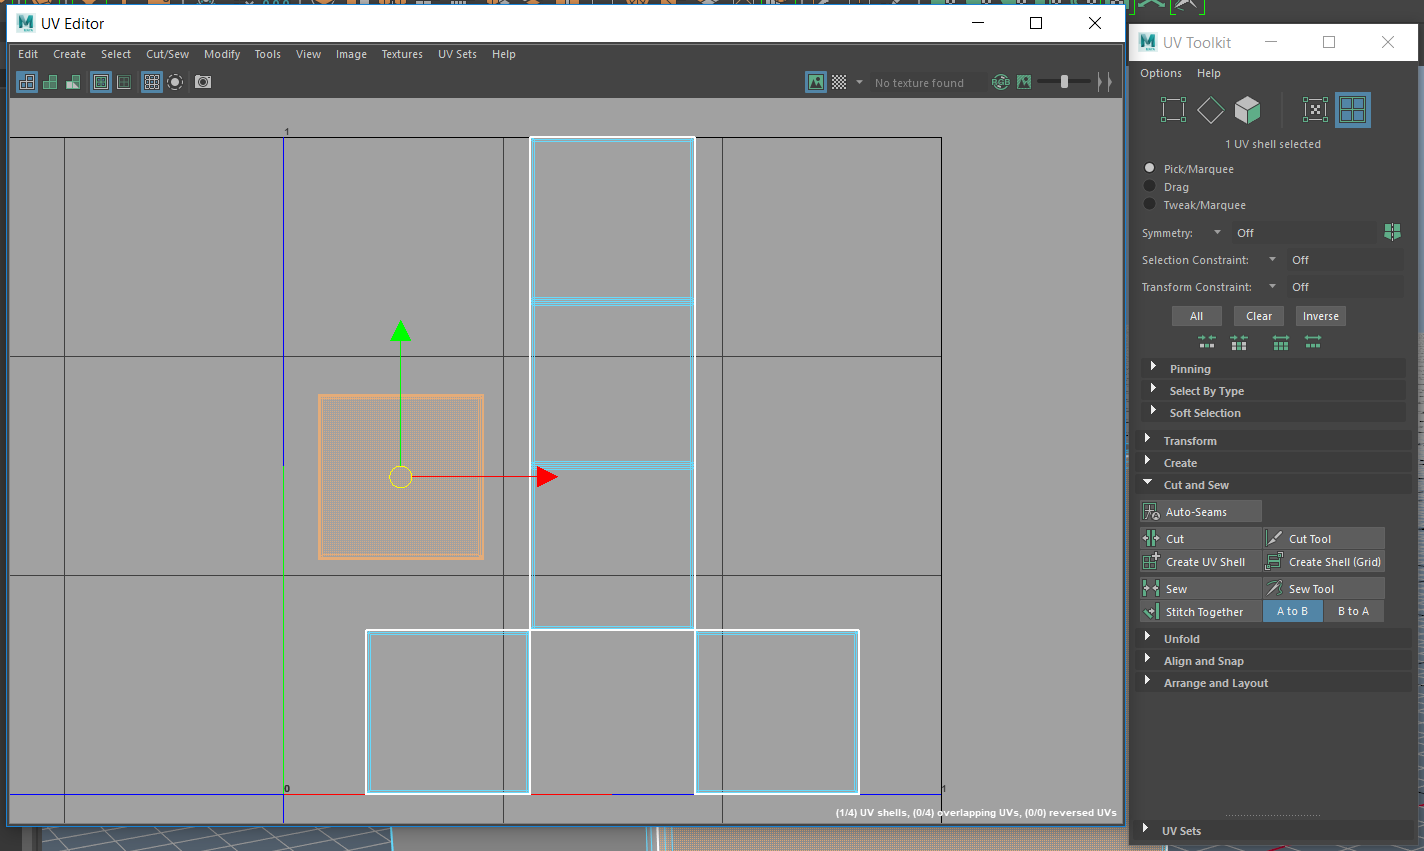 Cut out the front face of the cube, and subsequently cute the others and arrange them on along the 1x1 UV map
 Cut and arrange the faces to minimize unused space


